Edit Portrait like a PRO with Lightroom + Retouch4me
Editing studio portraits can seem overwhelming, but with the right tools and techniques, you can streamline the process and achieve stunning results. In this quick guide, I’ll walk you through how I edit my portraits using Lightroom and Photoshop, focusing on lighting, contrast, color grading, and skin retouching.
With Photoshop we are going to talk about the crazy plugins from Retouch4me that boost my editing a lot!
Step 1: Start with Proper Lighting
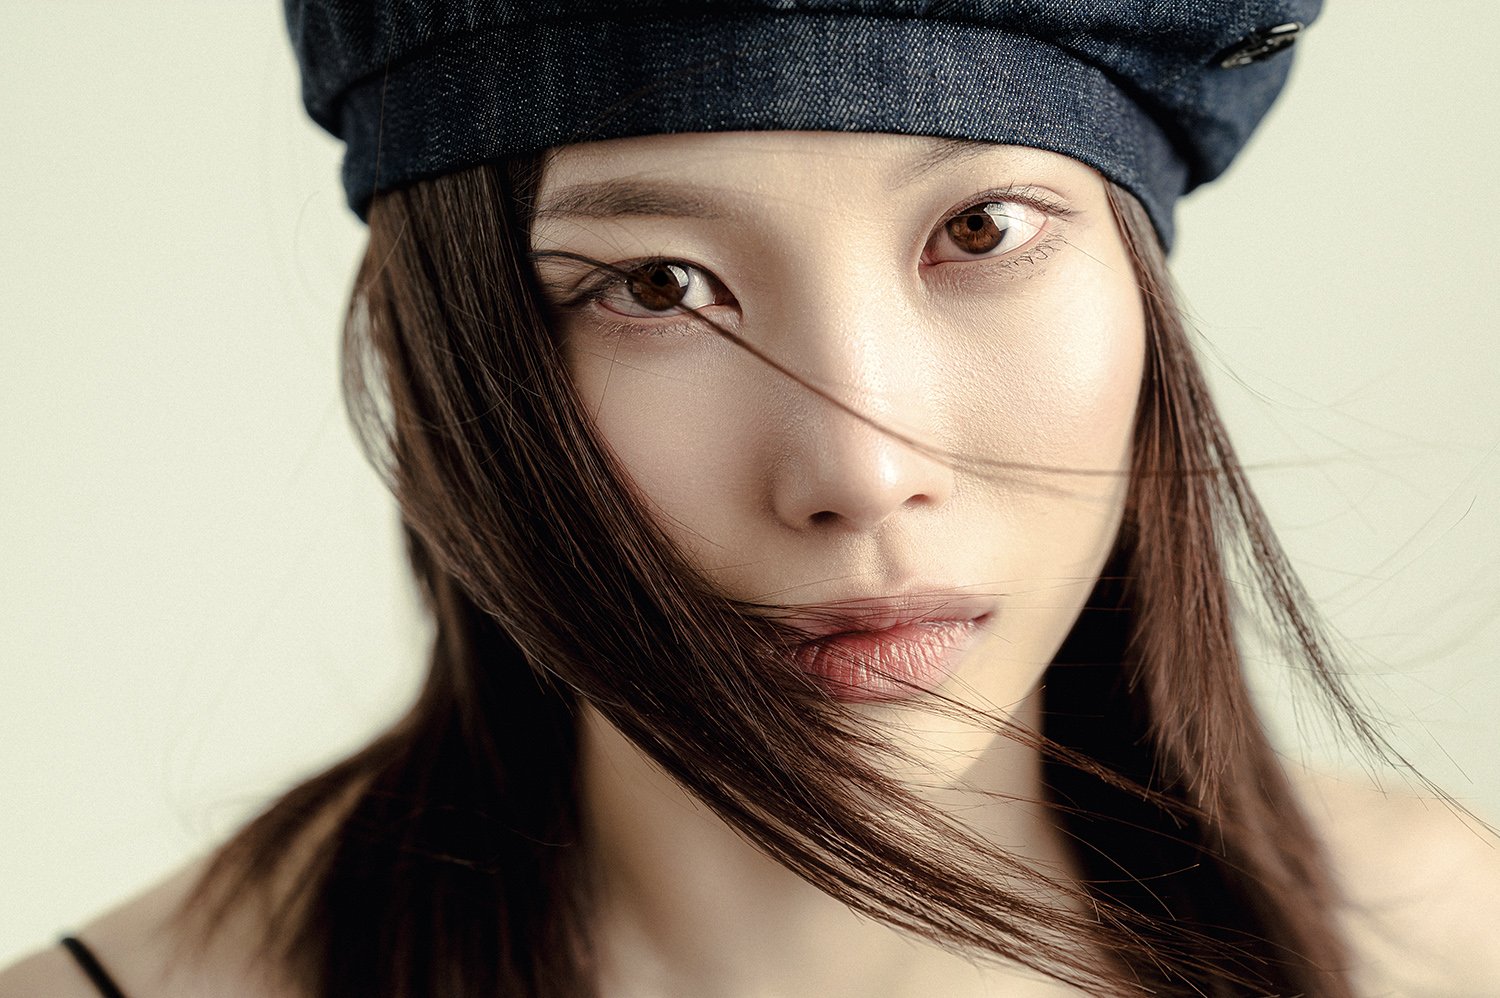
Before jumping into editing, it’s crucial to have a good lighting setup. In this portrait shoot with Jyu, I used a simple setup: a large light from the left side and a smaller backlight to balance the shadows. This setup helped avoid harsh contrasts and made editing easier. A makeup artist also helps, as it reduces the work needed in post-production.
We are going to talk about editing but keep in mind that what you do during the photoshoot will guide 90% of your editing, so make sure to work properly on it and don’t think you can save everything on you softwares.
Step 2: Basic Edits in Lightroom
Once you’ve imported the photo into Lightroom, start by choosing a profile. I often use Portrait v2 for a soft, flat look, making it easier to adjust contrast and color later. Even if you’re editing in colour, switch to black-and-white temporarily to better see how the contrast and shadows behave.
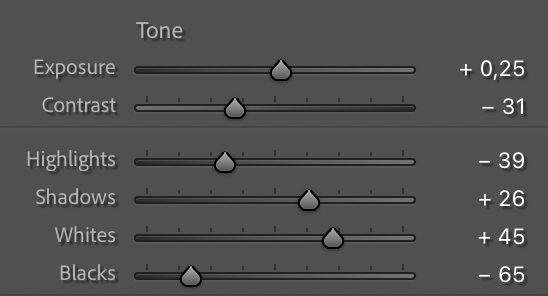
Make you settings YOURS!
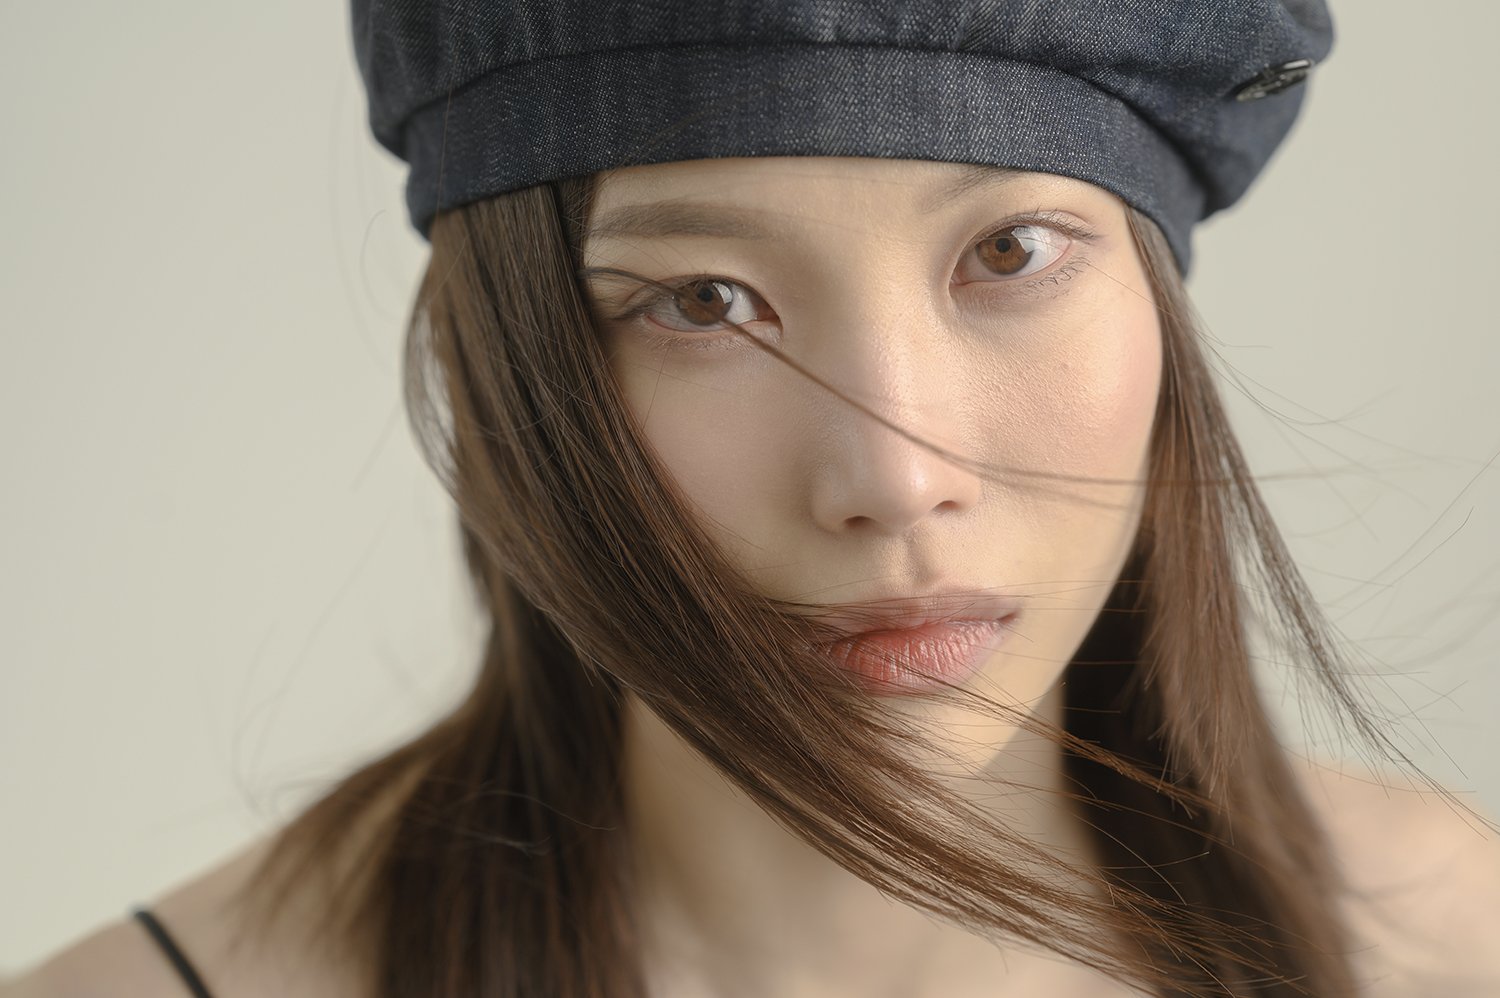
This is an exemple for MY picture but of course it will be different for every pictures, be creative.
Adjust Contrast and Tone
Lift the shadows to bring out details and carefully manage the highlights to avoid overexposure. Keep an eye on the histogram to maintain a balanced exposure. After tweaking the contrast, I apply my custom presets to make the process faster—these include enhancing the eyes and refining the overall look of the portrait.
Fine-Tune Skin Texture
Adjust clarity and texture to balance detail and softness. Lower the clarity slightly to create a softer, dreamier effect while maintaining skin texture. Be careful not to overdo it, as too much softness can make the portrait look unnatural.
Color Adjustments
After removing the black-and-white filter, reduce the saturation and boost vibrance to achieve natural skin tones. Use the calibration panel to tweak the overall color balance. For skin tones, I aim for a subtle pink hue while maintaining the natural look of the subject.
Curves and Color Grading
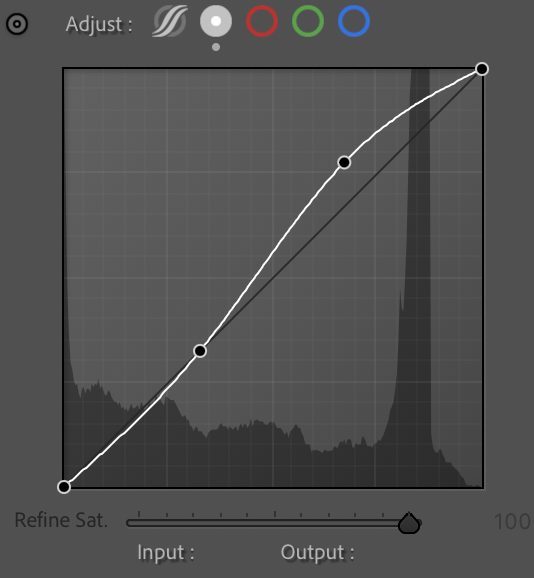
Use a light S-curve in the tone curve panel to add depth and contrast. You can also use the color grading panel to give the portrait a unique look. I usually add warm tones to the highlights and cool tones to the shadows, but keep it subtle to avoid an artificial feel.
Step 3: Skin Retouching in Photoshop
Once you’ve done the basic edits in Lightroom, switch over to Photoshop to focus on skin retouching. I use the Retouch For Me plugin, which simplifies the process and saves time.
Heal and Dodge & Burn
Start by running the heal function to remove minor imperfections like blemishes or stray hairs. Then, use Dodge & Burn to add dimension to the face. Be cautious not to overdo it, as this can flatten the natural contours of the face.
Refining Skin Tone
Use the skin tone tool to even out any inconsistent colors, such as redness or greenish tones. If the adjustment is too strong, reduce the opacity to maintain a natural look.
Add Final Texture
Lastly, I like to add a slight amount of grain (around 25%) to give the portrait texture and a more organic feel. It softens overly sharp details and enhances the overall finish of the image.
As you can see there are a lot of option to use and they are all very useful. You can check that in the video but it has been one of the best saving time tool I used in my editing workflow!
Step 4: Wrap It Up
After making these adjustments, save the photo in Photoshop, and it will automatically update in Lightroom. At this point, the portrait is ready for export or additional tweaks.


By following this workflow, you can create polished, professional-looking portraits with ease. If you’re interested in trying Retouch For Me, use my code MUTIN20 for a 20% discount on their plugins.
Or using this link: https://retouch4.me/products/retouch-plugins?promocode=MUTIN20
Happy editing!
BUSINESS COLLABORATION


